Understanding EQ: A Beginner's Guide
Equalization (EQ) is an essential tool in music production and mixing, used to adjust the balance of different frequency components within an audio signal. Whether you're an aspiring producer or a musician looking to refine your sound, understanding EQ is crucial. This guide will take you through the basics, helping you grasp how EQ works and how to use it effectively.
What is EQ?
EQ stands for Equalization, a process that adjusts the balance between frequency components in an audio signal. It's used to enhance or diminish specific frequencies, allowing you to shape the sound of individual tracks or entire mixes.
The Frequency Spectrum
The frequency spectrum ranges from 20 Hz to 20,000 Hz (20 kHz), which is the range of human hearing. This spectrum is divided into different bands, each affecting various aspects of the sound:
- Sub-bass (20-60 Hz): Adds depth and power, often felt more than heard.
- Bass (60-250 Hz): Fundamental frequencies for kick drums, bass guitars, and low-end instruments.
- Low Midrange (250-500 Hz): Warmth and body of the sound; excessive boosts can make the mix muddy.
- Midrange (500 Hz-2 kHz): Contains fundamental frequencies for most instruments and vocals; crucial for clarity and presence.
- Upper Midrange (2-6 kHz): Adds definition and intelligibility to vocals and instruments; excessive boosts can cause harshness.
- Presence (6-10 kHz): Adds brightness and presence; careful boosts can enhance clarity.
- Brilliance (10-20 kHz): Adds airiness and sparkle; excessive boosts can lead to a hissing sound.
Types of EQ
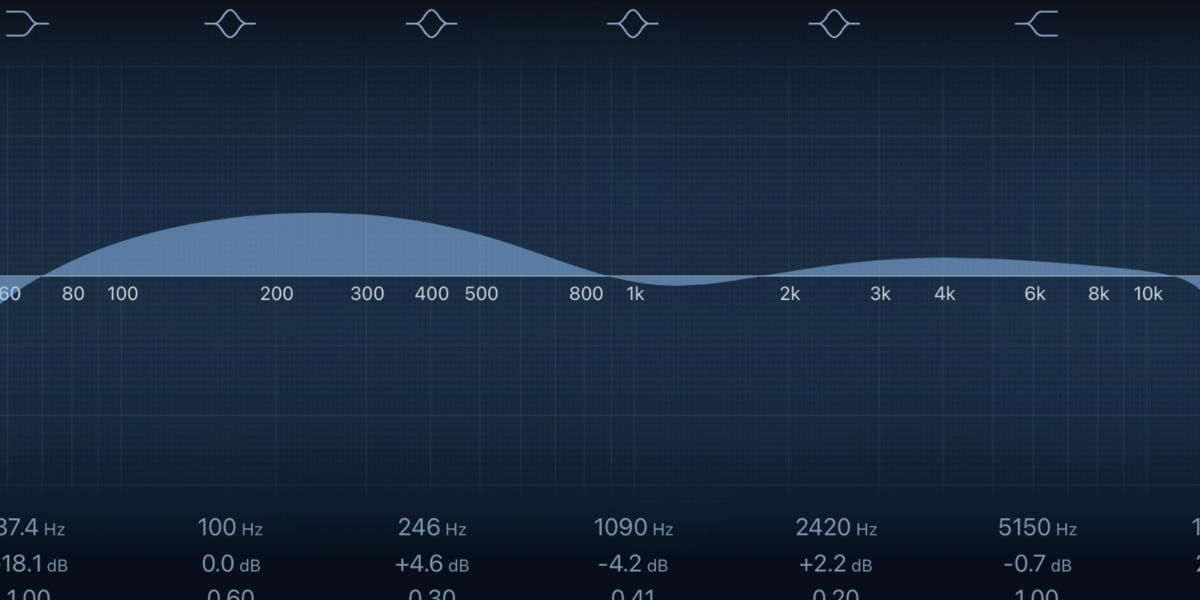
- Parametric EQ: Offers control over frequency, bandwidth (Q), and gain. It's versatile and precise, ideal for detailed adjustments.
- Graphic EQ: Fixed frequency bands with adjustable gain sliders. Useful for broad tonal shaping.
- Shelving EQ: Boosts or cuts frequencies above (high shelf) or below (low shelf) a set point. Great for general tone shaping.
- High-pass and Low-pass Filters: Remove frequencies below (high-pass) or above (low-pass) a certain point. Essential for cleaning up low-end rumble or high-end noise.
Basic EQ Techniques
- High-pass Filtering: Use high-pass filters to remove low-end rumble from non-bass instruments and vocals. Set the cutoff frequency where the unwanted noise starts.
- Cutting Problem Frequencies: Identify and cut frequencies that cause muddiness (around 250-500 Hz) or harshness (2-4 kHz). Use narrow Q settings for precise cuts.
- Boosting for Clarity: Slightly boost frequencies where instruments or vocals need more presence. For vocals, try a gentle boost around 3-6 kHz for intelligibility.
- Enhancing Bass and Sub-bass: Add depth and power by boosting sub-bass (20-60 Hz) and bass (60-250 Hz) frequencies for bass-heavy instruments.
- Adding Air and Sparkle: Boost frequencies in the brilliance range (10-20 kHz) to add airiness to vocals and overall mix brightness.
Practical EQ Tips
- Use Reference Tracks: Compare your mix to professionally mixed tracks to guide your EQ decisions.
- Solo and Mix Context: EQ instruments both in solo and within the mix. Sometimes what sounds good in solo may not work in the full mix.
- Small Adjustments: Start with subtle adjustments. It's easy to overdo EQ changes, leading to an unnatural sound.
- Listen on Different Systems: Test your mix on various playback systems (headphones, speakers, car audio) to ensure your EQ choices translate well.
- Use Visual Tools: Many EQ plugins have visual analyzers that show the frequency spectrum. These can help you see problem areas and understand your adjustments.
Conclusion
Understanding EQ is fundamental for shaping and refining your music. By mastering the basics of frequency bands, EQ types, and practical techniques, you can make informed decisions to enhance the clarity, balance, and overall quality of your tracks. Remember, EQ is as much an art as it is a science, so practice and trust your ears as you develop your skills.

